DIY Dog Balance Beam: Safe Progressive Home Guide
By Maya Chen • 3rd Mar
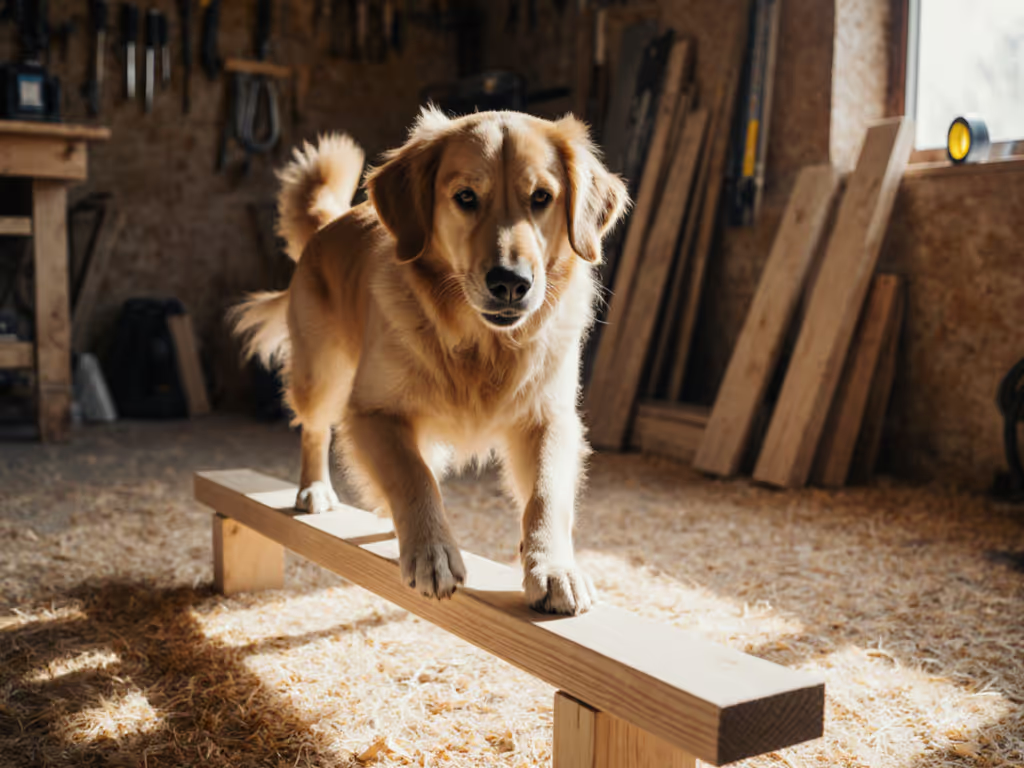
What Is a DIY Dog Balance Beam and Why Should I Build One?
A DIY dog balance beam is a homemade canine obstacle (typically a wooden platform or elevated structure) that teaches your dog to engage core muscles, shift weight deliberately, and navigate terrain with precision. Unlike flashy gadgets that promise quick fixes, a balance beam delivers what matters: real reps your dog can win in context. Building one yourself ensures it fits your space, matches your dog's size, and aligns with your training goals rather than marketing claims. For additional build plans and safe variations, explore our DIY pro-level training equipment guide.
Balance work underpins steady leash mechanics and environmental composure. A dog who has practiced weight distribution on unstable surfaces transfers that body awareness to street walks (fewer stumbles, more control through turns, less jarring on joints). For rescue adolescents or dogs recovering confidence, the controlled, rewarding success of beam work builds neural pathways that later translate to calm outdoor behavior. The core strengthening also benefits older dogs and those prone to stiffness.
What Are the Critical Safety Considerations Before I Start?
Before cutting a single board, understand your non-negotiables. Safety notes first:
- Non-slip surface is mandatory. Bare wood or plywood is a tracheal-impact injury waiting to happen. Carpet remnants, outdoor non-skid adhesive tape, or safety grip tape must cover the entire top surface. Sand any rough spots to avoid splinters.
- Height matters by dog. A wobble board or tilt board is safer for first-timers and toy breeds; a low balance beam (6-12 inches) suits medium dogs and adolescents. Never use height as a challenge; use surface instability.
- Supervision is absolute. Even a well-built beam can tip if a dog launches sideways or a stray nail catches a collar. Never leave your dog unattended on any DIY equipment.
- Test stability before your dog touches it. Does it rock? Does it tip? Does any fastener flex? A wobbly frame trains poor balance and erodes confidence.
- Pre-drill all holes to prevent wood splitting and splintering. A cracked board can splinter into the paw or mouth.
- Use non-toxic finishes only. Pressure-treated lumber, lead-based paint, or stain your dog may chew or mouth is a toxicity risk. Primer and non-toxic acrylic paint only.
What Materials and Tools Do I Actually Need?
The simplest homemade canine obstacle requires minimal investment. Here's what translates to a functional beam:
Core materials:
- Plywood or 2×4 lumber (width and length depend on your dog's size; dimensional lumber shrinks about half an inch from its listed width)
- Wood screws (pre-drill to prevent splitting)
- Wood glue (for reinforcing joints)
- Non-slip surface: carpet remnant, outdoor adhesive-backed non-skid tape, or safety grip tape
- Paint: non-toxic primer and acrylic paint, sanded between coats
- Wood filler (for seams, optional but extends durability)
Essential tools:
- Saw (skill saw, miter saw, or table saw; many hardware stores will cut to size for a small fee)
- Drill with bits (including countersink for flush screws)
- Measuring tape, pencil, safety glasses
- Sanding block or orbital sander
- Clamps for gluing
Optional but useful:
- Router (to round edges and countersink bolt heads)
- Band saw (for cutting semi-circular feet)
How Do I Build a Simple Balance Beam Step-by-Step?
There are two common approaches: a low-profile wobble board (easiest, fastest) and a hinged balance beam (more adjustable). I'll outline the wobble board because it teaches core engagement immediately and requires no hinges.
Phase 1: Cutting and Assembly (1–2 hours)
- Select lumber. A 2×10 or 2×12 board works well for most medium dogs; measure your dog's chest width and choose accordingly. Cut to 3–4 feet in length.
- Cut the base. Measure and cut a semi-circular or half-round piece of wood (e.g., 2 inches thick, 6-inch radius) to sit beneath the beam. This is your rocker.
- Assemble the base. Glue and clamp the semi-circular base to the center underside of the beam. Once dry, pre-drill and secure with wood screws (two per joint minimum).
- Test stability. Place it on a flat surface. Does it rock smoothly? Does it tip?
Phase 2: Finishing (1–2 hours, drying time variable)
- Sand thoroughly. Use 80–120 grit sandpaper on all surfaces, edges, and notches until smooth. No rough edges, no splinters.
- Apply primer and paint. Two coats of non-toxic acrylic paint, sanding lightly between coats. Allow complete drying (check manufacturer guidelines, usually 24 hours).
- Add non-slip surface. Measure and cut grip tape or adhesive-backed non-skid tape to cover the top surface and wrap around edges (like wrapping a present). Press firmly with a scrap block of wood to ensure adhesion.
- Inspect fasteners. Check all screws are flush or countersunk. Anything protruding is a catch point for collars or paws.
Fit first, then features. A solid, stable, non-slip beam with zero sharp edges beats a fancy design every time.
What's the Difference Between a Wobble Board, Tilt Board, and Balance Beam?
These terms overlap, but the mechanics differ, and so does the progression difficulty.
| Equipment | Base Design | Movement | Difficulty | Best For |
|---|---|---|---|---|
| Wobble board | Semi-circle or half-round | Rocks side-to-side | Beginner; easier weight shift | All dogs; first introduction |
| Tilt board | PVC pipe or cylindrical base | Tilts fore-and-aft | Intermediate; requires balance adjustment | Dogs comfortable with instability |
| Balance beam | Hinged or flat-bottomed beam | Minimal movement; height challenge | Advanced; weight and height awareness | Confident dogs, sport training |
Steeper angles in tilt boards increase difficulty. Start with wobble; add tilt once your dog is confident. Height is never the first progression. If you’re deciding between surfaces, here’s our head-to-head on balance pads vs discs for safer instability work.
How Do I Introduce My Dog to the Beam Using Positive Reinforcement?
Introduction follows time-boxed steps with clear criteria and reward timing.
Step 1: Platform presence (Days 1–3, 2–3 minutes daily)
- Place the beam on flat ground in a quiet area.
- Release your dog to investigate at their own pace. No pressure to get on.
- Cue-Criteria-Reward: The moment a front paw touches the beam, mark ("Yes!") and deliver high-value reward (small meat or cheese) at nose level.
- Repeat 5–8 times per session. Picking the right reinforcers makes progress faster—see our dog training treats guide for size, nutrition, and value tips.
- Clear safety note: Supervise constantly; remove collar to avoid catching.
Step 2: Two-paw engagement (Days 4–6, 3–5 minutes daily)
- Reward front paws on the beam.
- Progress to rewarding when both front paws are on the surface (static, no rocking).
- Reward right at nose level while the paws remain in contact.
Step 3: Full commitment and hold (Days 7–10, 5 minutes daily)
- Reward all four paws on the beam, stationary.
- Once consistent, add a brief pause (1–2 seconds) before reward: "On." (cue) → Dog steps fully up (criteria) → Pause, mark ("Yes!") → Treat (reward).
- Gradually extend the pause to 5–10 seconds.
Step 4: Movement and weight shift (Ongoing, 5–10 minutes, 3–4 sessions weekly)
- Once your dog stands confidently, introduce gentle rocking. You rock the beam slightly; your dog adjusts balance.
- Reward the micro-shifts (weight to one side, then the other).
- Evidence-labeled insight: Dogs that practice weight shifting on wobble surfaces show improved limb placement and fewer front-end compensations during normal walking.
Progressive balance beam challenges should expand in this order: stability → duration → movement → environmental distraction (sounds, people nearby). Never skip steps. When you’re ready to add sounds, movement, and people, follow our distraction training progression for reliable focus.
What Are Common Mistakes That Undermine Success?
- Skipping the non-slip surface. A dog's paw slides; they panic; trust erodes. Not negotiable.
- Height before stability. Adding height before your dog is rock-solid on a flat or gently rocking beam backfires. Core strength comes before height navigation.
- Inconsistent reward timing. If you sometimes reward effort and sometimes demand perfection, your dog stops trying. Mark the instant the behavior occurs.
- Mixing contexts too fast. Master the beam at home in quiet. Only then introduce it near mild distractions (ambient noise, a calm person nearby). Only after week 4–6 try outdoor settings.
- Using punishment or pressure. "Making" a dog get on the beam teaches avoidance, not confidence. Positive reinforcement is non-negotiable.
- Neglecting structural inspection. A loose screw or soft joint that flexes unpredictably trains poor balance and creates fear. Test weekly.
- Overtraining. Fatigue leads to sloppy form and injury. Keep sessions short and stop when your dog is still enthusiastic.
What's the Real-World Payoff? How Does Beam Work Transfer to Daily Life?
On a rainy weeknight, deliberate repetition builds muscle memory. A dog that's spent three weeks rocking gently on a wobble board begins to anticipate weight distribution: how to stay steady when you turn sharply, how to adjust footing on wet pavement, how to settle through minor jolts. That neural investment shows up in fewer pulling compensations and quieter, more confident street behavior. A dog with body awareness also settles more easily, because they understand how to position themselves for stability and comfort.
Goal-to-gear mapping: If your goal is a calm, controlled street walk with balanced weight distribution, beam work is a direct training tool. If your goal is recall reliability, beam work is a supporting tool (confidence + body awareness = better focus). If your goal is managing reactivity outdoors, beam work is a foundation: dogs who've practiced quiet focus on a wobble board are primed for the decompression drills that really shift reactivity.
What Should I Do Next?
Start now with these concrete steps:
- Measure your dog. Chest width (at widest point), length (withers to tail base), and weight. Visit a hardware store's lumber aisle and note the actual width of 2×10, 2×12 boards (it'll be about half an inch smaller than listed).
- Choose your first build. A wobble board (half-round base, grip tape) is the fastest and safest entry point. Gather materials this week; budget 3–4 hours for the full build including drying time.
- Build it. Follow Phase 1 and Phase 2 above. Pre-drill every hole. Test on a flat surface before your dog touches it.
- Start the introduction sequence. Use the time-boxed steps, exactly as written. Mark behavior immediately; reward within a half-second. Session length matters, and 5 minutes beats 20 minutes of half-hearted repetition.
- Track consistency. Note which day your dog first offers all four paws voluntarily. Which session they first tolerate a 5-second hold. Progress isn't linear, but documentation reveals patterns and builds confidence. For easy tracking and slow‑motion review, try one of our recommended training video analysis apps.
Balance work is not a gadget. It's a humane, progressive tool that teaches your dog their own body, and in doing so, builds the calm competence that shows up on every walk.
Related Articles